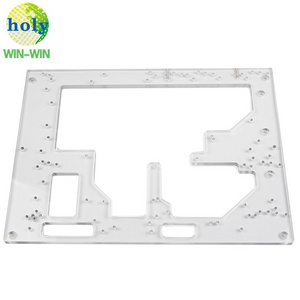
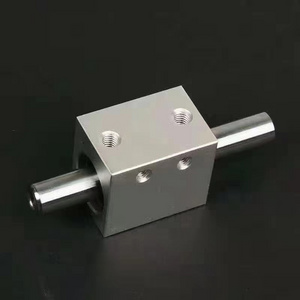
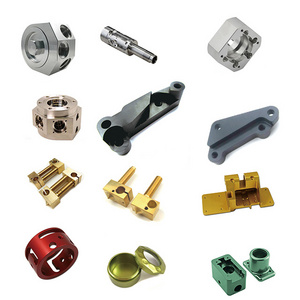
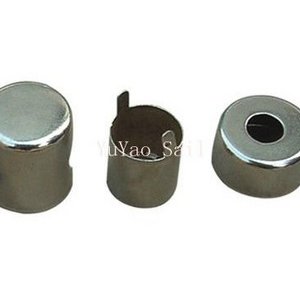
As milling, the finish option with the quickest turnaround. Machined parts are left with visible tool marks and potentially sharp
edges and burrs, which can be removed upon request. CNC machining surface finish is comparable to 125 uin Ra finish.
- Product Details
- {{item.text}}
Quick Details
-
Model Number:
-
CNC
-
Brand Name:
-
Fohan
-
Processing Type:
-
CNC
-
Material:
-
Plastic/Metal/Wood
-
Surface treatment:
-
Depends
-
Tolerance:
-
±0.127mm
-
MOQ:
-
1
-
OEM/ODM:
-
Support
-
Quality control:
-
Support
-
Product Type:
-
Customized service
-
File Format:
-
.stl
-
Keyword:
-
CNC Prototyping
Quick Details
-
CNC Machining or Not:
-
Cnc Machining
-
Material Capabilities:
-
Aluminum, Brass, Bronze, Copper, Hardened Metals, Precious Metals, Stainless steel, Steel Alloys, ABS like resin
-
Place of Origin:
-
Guangdong, China
-
Model Number:
-
CNC
-
Brand Name:
-
Fohan
-
Processing Type:
-
CNC
-
Material:
-
Plastic/Metal/Wood
-
Surface treatment:
-
Depends
-
Tolerance:
-
±0.127mm
-
MOQ:
-
1
-
OEM/ODM:
-
Support
-
Quality control:
-
Support
-
Product Type:
-
Customized service
-
File Format:
-
.stl
-
Keyword:
-
CNC Prototyping
Why Choose Fohan for Custom CNC Machining Services?
● We have over 20 years of experience
● we have 126 sets of processing equipment
● 3-7 days of fast delivery
● 95% qualification rate
● 0.006mm high precision tolerance
Fohan assures the quality of your machined parts with our ISO 9001:2015, ISO 13485, and AS9100D certified quality management system, and options to add inspections, hardware traceability, material certifications etc. We accept technical drawings and have QC teams to ensure you get quality CNC machined parts on time.

|
Milling
|
Turning
|
|
|
Milling is a commonly used processe for machining custom parts. Using rotary cutter to remove material from workpiece. Control the directions of axes, cutter heads' speed, and the pressure to make different shapes. Milling covers a wide variety of different operations and machines, from small individual parts to large.
|
|
|
|
Max Part Size
|
2,032 x 1,219 x 610 mm
|
|
|
Tolerances
|
+/- 0.127 mm
|
|
|
Leading Time
|
1-3 working days
|
|

|
Turning
|
Turning
|
|
|
Turning is a machining process in which a cutting tool, typically a non-rotary tool bit, describes a helix toolpath by moving more or less linearly while the workpiece rotates.
|
|
|
|
Max Part Size
|
2,032 x 1,219 x 610 mm
|
|
|
Tolerances
|
+/- 0.127 mm
|
|
|
Leading Time
|
1-3 working days
|
|

|
Lathe CNC
|
Lathe CNC
|
|
|
CNC lathe is a subtractive method to prototype shapes. With the G-Code created, a blank bar of stock material is loaded into the chuck of the lathe's spindle. The chuck holds the workpiece in place while the spindle spins. When the spindle is up to speed, a stationary cutting tool is brought into contact with the workpiece to remove material until the desired geometry is achieved.
|
|
|
|
Max Part Size
|
1,575 mm x 813 mm x 813 mm
|
|
|
Tolerances
|
+/- 0.127 mm
|
|
|
Leading Time
|
1-3 working days
|
|
CNC Machining and Engineering Design Guide
|
CNC Machining Tolerances
|
General Tolerances
|
Tolerances on metals will be held to +/- 0.005" (+/- 0.127 mm) in accordance with ISO 2768 unless otherwise specified. Plastics
and composites will be +/- 0.010”. |
|
|
||
|
|
Precision Tolerances
|
can manufacture and inspect to tight tolerances per your drawing specifications including GD&T callouts.
|
|
|
||
|
Size
|
Maximum Part Size
|
Lathe can make size to: 1,575 mm x 813 mm x 813 mm;
Turnning and Milling can make size to: 2,032 x 1,219 x 610 mm |
|
|
||
|
Feature
|
Minimum Feature Size
|
0.020” (0.50 mm). This may vary depending on part geometry and chosen material.
|
|
|
||
|
|
Internal corner fillets
|
Design internal corner fillets to be 0.020” - 0.050” greater than a standard drill size for the radii. Follow a drill diameter to
depth ratio of 1:6 (1:4 recommended) as a guideline for internal corner radii. |
|
|
||
|
|
Floor fillets
|
Design floor fillets smaller than corner fillets to allow the same tool to clear material from the interior.
|
|
|
||
|
|
Undercuts
|
Always design undercuts to standard sizes and away from corners so they are accessible by the cutting tool.
|
|
|
||
|
|
Tapped/threaded hole depth
|
Provide tool clearance slightly beyond the tapped hole depth to ensure complete threads.
|
|
|
||
|
|
Complexity
|
Keep the number of small cuts to a minimum to reduce CNC machining costs; only design in the necessary features to balance
function with aesthetic. |
|
|
||
|
Materials for CNC
|
|
|
|
|
||||
|
Aluminum
|
Stainless Steel
|
Other Steel
|
Other Matel
|
Plastic
|
||||
|
1100
|
15-5
|
Alloy steel 1215
|
Brass C360
|
ABS
|
||||
|
2014
|
17-4
|
Alloy steel 4140
|
Brass C510
|
Acrylic
|
||||
|
2017
|
2205 Duplex
|
Alloy steel 4340
|
Brass C544
|
Nylon 6/6
|
||||
|
2024
|
301
|
Alloy steel 4605
|
Brass CZ112/CW712R
|
PC
|
||||
|
3003
|
303
|
Mild steel 1018
|
Brass CZ121
|
UHMW-PE
|
||||
|
5052
|
304
|
Mild steel 1045
|
Brass H59
|
PVC
|
||||
|
5083
|
304 L
|
Mild steel A36
|
Brass H62
|
PTFE
|
||||
|
5754
|
316
|
Mild steel S275
|
Copper C101
|
polypropylene
|
||||
|
6061
|
316 L
|
Tool steel A2
|
Copper C110
|
PEEK
|
||||
|
6061 T6
|
321
|
Tool steel A3
|
Copper C172
|
HDPE
|
||||
|
6063
|
416
|
Tool steel D2
|
Inconel 718
|
garolite G10
|
||||
|
6082
|
420
|
Tool steel H13
|
Invar (FeNi36)
|
Delrin
|
||||
|
6082 T6
|
430
|
Tool steel M2
|
Magnesium AZ31B
|
|
||||
|
7075
|
440C
|
Tool steel O1
|
Titanium Grade 1
|
|
||||
|
7075 T6
|
|
Tool steel S7
|
Titanium Grade 2 (Pure)
|
|
||||
|
A380 (LM24)
|
|
|
Titanium Grade 5 (TC4)
|
|
||||
|
A383 (LM2/ADC12)
|
|
|
|
|
||||
|
MIC6
|
|
|
|
|
||||
|
|
|
|
|
|
||||
CNC Machining Surface Finishes

Standard
Bead Blast
Surface will be left with a smooth, matte appearance.
Tumbles
Tumbles vibrating media to remove sharp edges and burrs on CNC parts. Tumbling can remove machine marks on exterior surfaces.
Parts over 8” may require a manual review.
Parts over 8” may require a manual review.
Anodized
Parts can be anodized in different colors—clear, black, red, and gold are most common—and is usually associated with aluminum.
Passivation
Improves corrosion resistance for 200 and 300 series and precipitation hardened corrosion-resistant steels. Thickness is
negligible, about 0.0000001”. Conforms to ASTM A967, AMS-QQ-P-35, MIL-STD-171, ASTM A380, or AMS 2700.
negligible, about 0.0000001”. Conforms to ASTM A967, AMS-QQ-P-35, MIL-STD-171, ASTM A380, or AMS 2700.
Electropolishing
An electrochemical process cleans steel parts to reduce corrosion and improve appearance, by making the metal brighter. Removes
about 0.0001”-0.0025” of the metal. Conforms to ASTM B912-02.
about 0.0001”-0.0025” of the metal. Conforms to ASTM B912-02.
Electroless Nickel Plating
Provides uniform nickel coating which offers protection from corrosion, oxidation, and wear on irregular surfaces. The finished
part will be brighter. Thickness starts at .0001”. Conforms to MIL-C-26074.
part will be brighter. Thickness starts at .0001”. Conforms to MIL-C-26074.
Zinc Plating
Provides uniform zinc coating which offers protection from corrosion, oxidation, and wear on irregular surfaces. Conforms to ASTM
B633-15.
B633-15.
General Questions
|
Quotation
|
According to your drawing(size, material, thickness, processing content and required technology, etc.)
|
|
|
|
|||
|
Processing
|
CNC Turning, Milling parts, Drilling, Auto Lathe, Tapping, Bushing, Surface Treatment, etc.
|
|
|
|
|||
|
Material
|
Aluminum, Copper, Stainless Steel, Iron, PE, PVC, ABS, etc.
|
|
|
|
|||
|
Tolerance丨Surface Roughness
|
+/-0.005 - 0.01mm 丨 Ra0.2 - Ra3.2(Customize avaiable)
|
|
|
|
|||
|
Surface Treatment
|
Polishing, general/hard/color oxidation, surface chamfering, tempering, etc.
|
|
|
|
|||
|
Testing Equipment
|
CMM / Tool microscope / multi-joint arm / Automatic height gauge / Manual height gauge / Dial gauge / Roughness measurement
|
|
|
|
|||
|
Our Advantages
|
1.) 24 Hours Online Service & Quickly Quote / Delivery.
2.) 100% QC quality inspection before delivery, and can provide quality inspection form. 3.) 18+ years of experience in the CNC machining area and have a senior design team to offer perfect modification suggestions. |
|
|
|
|||
|
Logo
|
Customized
|
|
|
|
|||
|
MOQ
|
1
|
|
|
|
|||
|
Port
|
Guang Dong, Shenzhen, Dong Guan
|
|
|
|
|||
|
Leading Time
|
within 7 days
|
|
|
|
|||
Different Rapid Prototype Method Comparing
|
|
3D Printing
|
CNC Machining
|
Casting
|
Injection Moulding
|
||||
|
MOQ
|
1
|
1
|
Small Batch
|
Mass Production
|
||||
|
Leading Time
|
1 day
|
≥2 days
|
≥10 days
|
≥20 days
|
||||
|
Materials
|
ABS Like| Metal | Nylon
|
Nearly all Material
|
Metal
|
Plastic
|
||||
|
|
|
|
|
|
||||
|
Other Successful Cases
|
|
|
|
|
||||
FQA
A: We are the biggest 3D printing manufacturer in China with 20 years experience and have over 800 sets industrial SLA printers.
Q: How long is your lead time?
A: 1. 3D drawings: about 5-7 days, it depends on the complex of your products.
2. 3D printing: about 1-3 days, it depends on the sizes of your prototypes.
3. Polishing/surface
treatments: about 1-3 days, it depends on your requests on surface treatment.
treatments: about 1-3 days, it depends on your requests on surface treatment.
4. Functional making: about 2-5 days, it depends what kinds of function you need.
5. Painting: about 2-4 days, it depends on the qty of prototypes.
6. Delivery time: about 4-5days
Q: What are files you need for quote?
A: 1. It's better to offer 3D files, like STP, STL, IGS, PARASOLID, etc.
2. 2D file isalso ok with detail requests.
Q: Do you provide samples ? is it free or extra ?
A: Yes, we could offer the sample for free charge but the freight be paid by customer
Hot Searches


