
- Product Details
- {{item.text}}
Quick Details
-
Model Number:
-
MSC2300
-
Product name:
-
2300W Solar Powered Rice Stove Oven Solar Cooker for Camping Yard
-
Focus:
-
Partial focus
-
Shape:
-
Rectangular
-
Power:
-
2300W
-
Max Temperature:
-
1200W
-
Reflector QTY:
-
6PCS
-
Specification:
-
130*190CM
-
Material:
-
High quality Carbon steel+Vacuum aluminized film
-
Cook water time:
-
21 minuter/3KGS water
-
Certification:
-
CE,FCC,RoHS
Quick Details
-
Warranty:
-
1 year, 1 years warranty, Guarantee for use of 10 years
-
Place of Origin:
-
Fujian, China
-
Brand Name:
-
Mars Rock
-
Model Number:
-
MSC2300
-
Product name:
-
2300W Solar Powered Rice Stove Oven Solar Cooker for Camping Yard
-
Focus:
-
Partial focus
-
Shape:
-
Rectangular
-
Power:
-
2300W
-
Max Temperature:
-
1200W
-
Reflector QTY:
-
6PCS
-
Specification:
-
130*190CM
-
Material:
-
High quality Carbon steel+Vacuum aluminized film
-
Cook water time:
-
21 minuter/3KGS water
-
Certification:
-
CE,FCC,RoHS
Recommend Products
Product Description
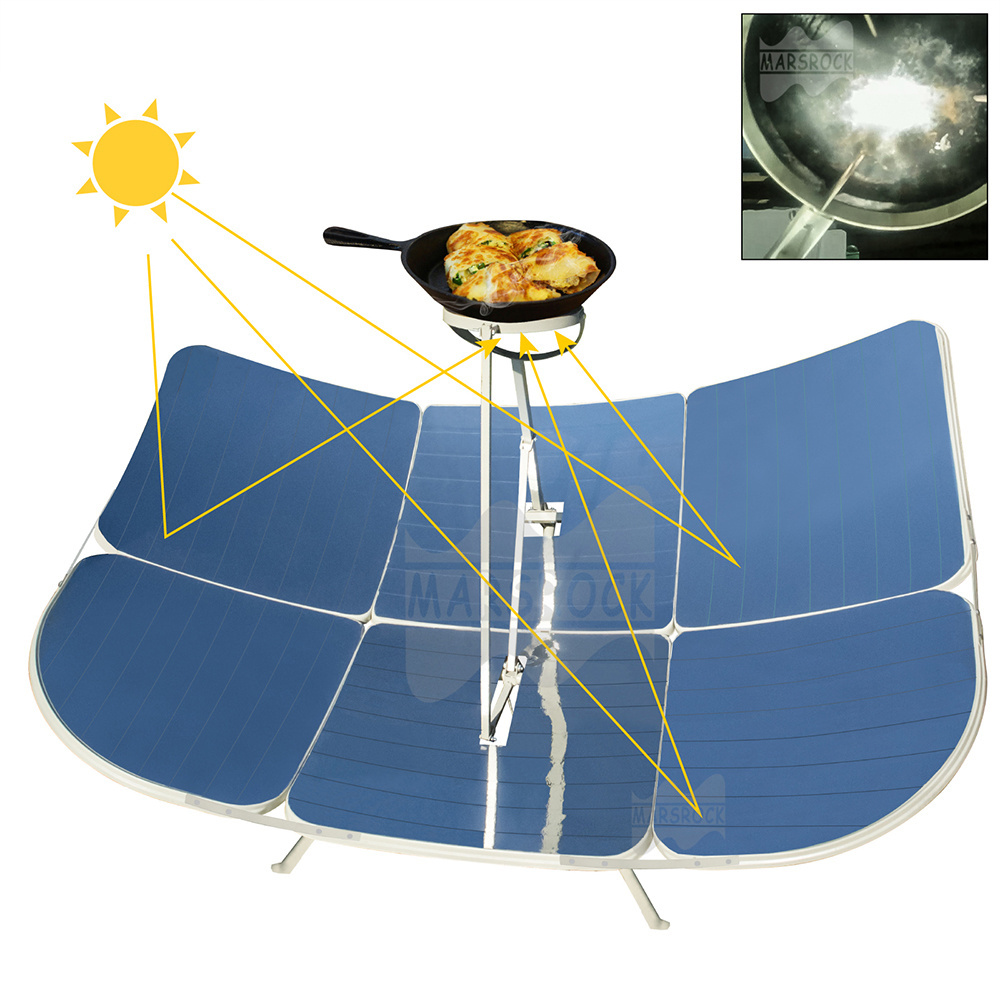
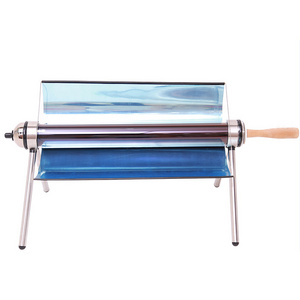
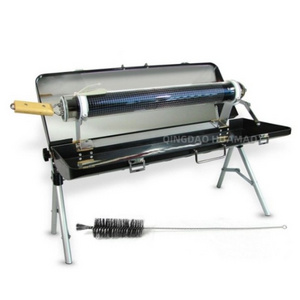
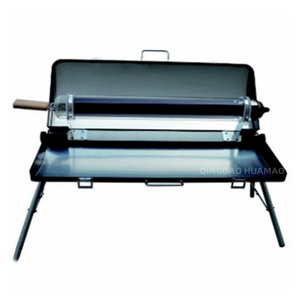
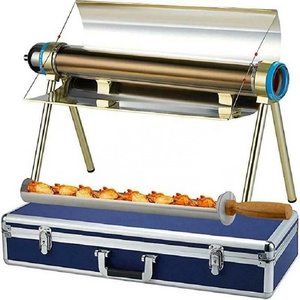
Product Introduction.
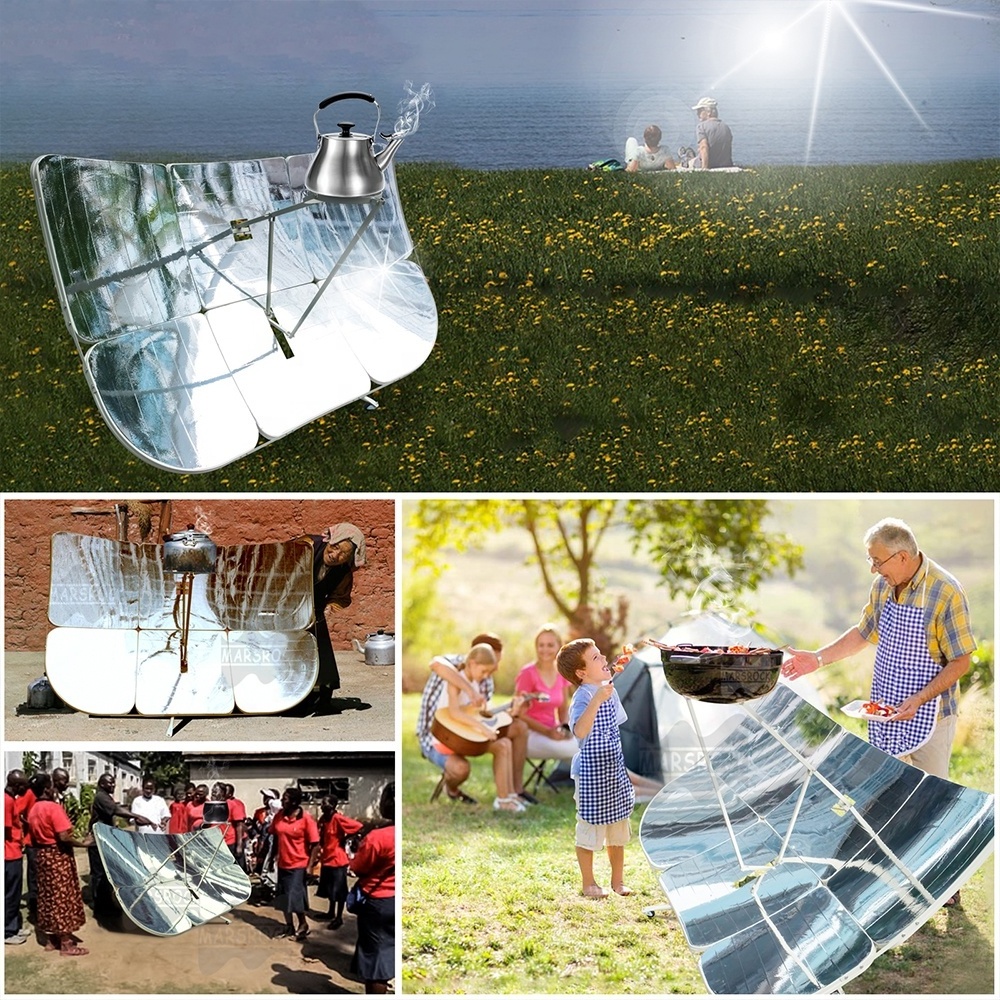
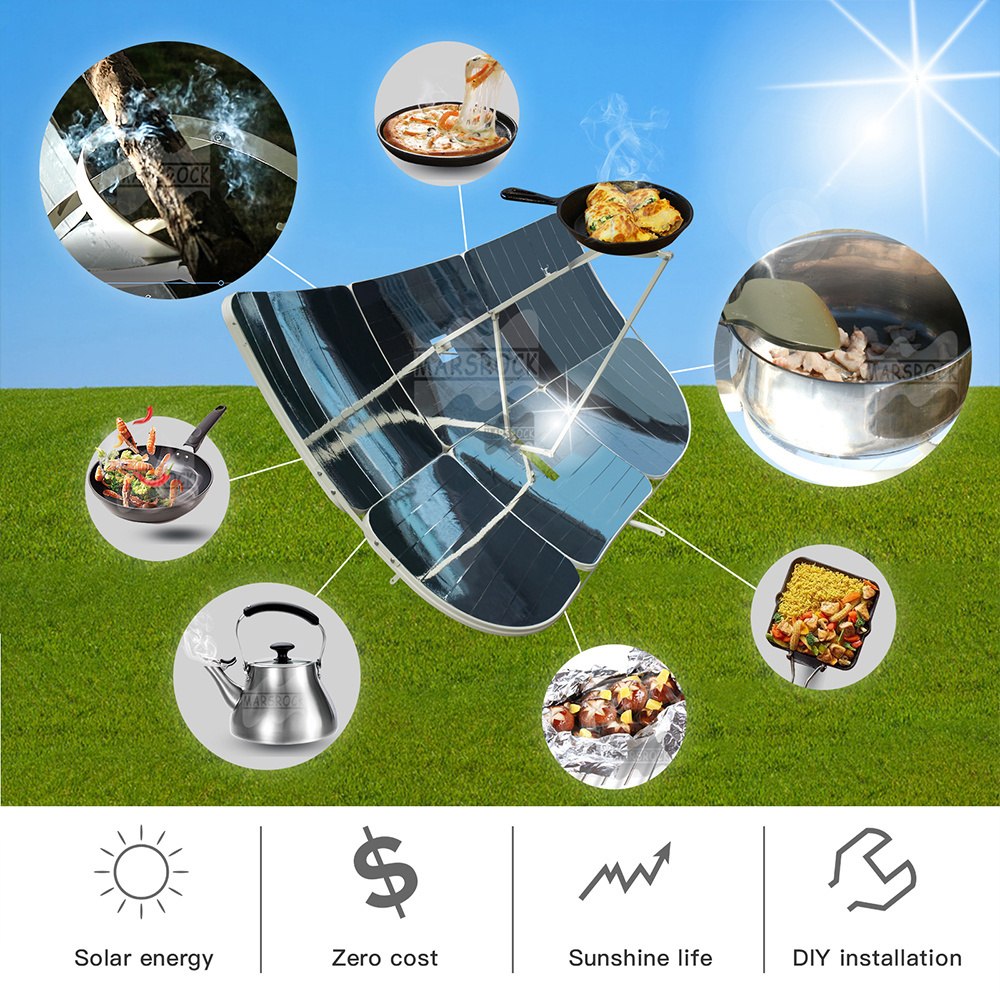
Solar stove is a kind of appliance(stove) that collects solar energy for cooking and burning water.
The key component of the solar stove is the polarizing mirror, which not only has the choice of mirror material, but also has a geometric design.
The most common mirrors are silver-plated or aluminum-plated glass mirrors, aluminum polished mirrors and polyester thin film aluminized materials.
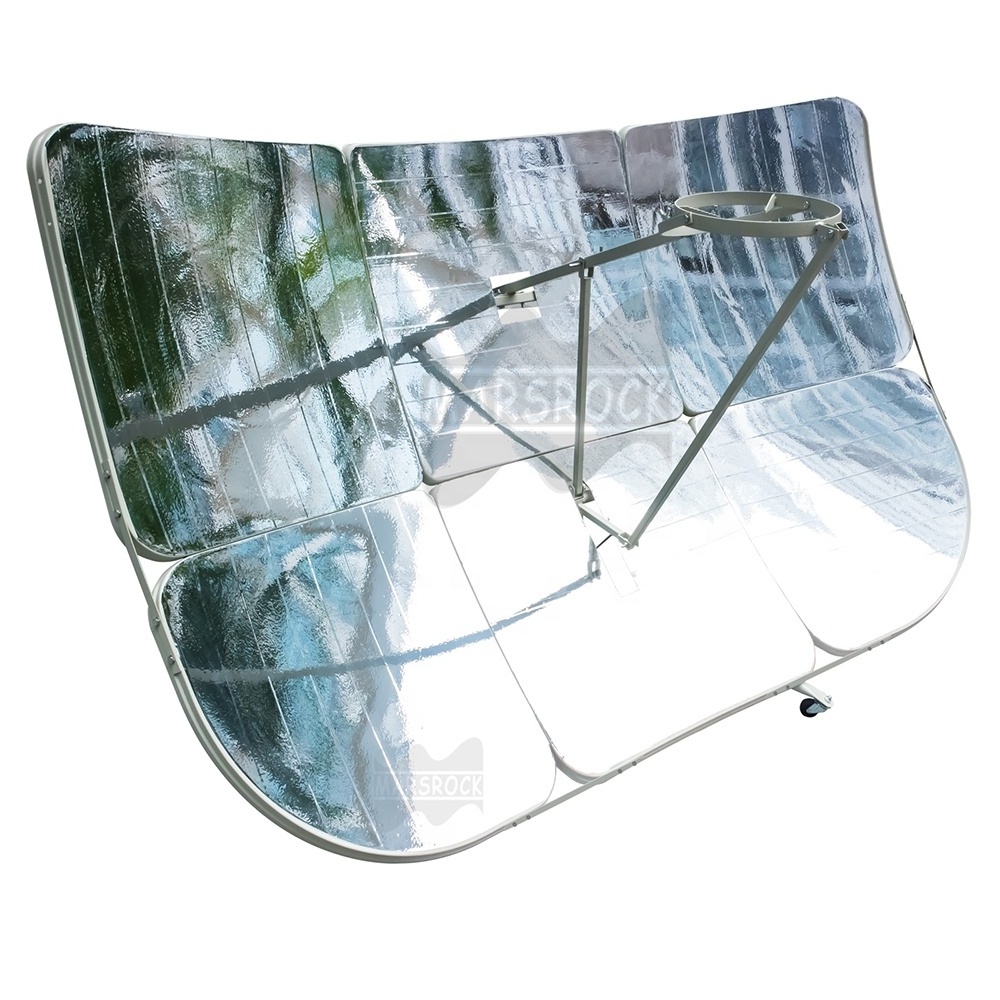
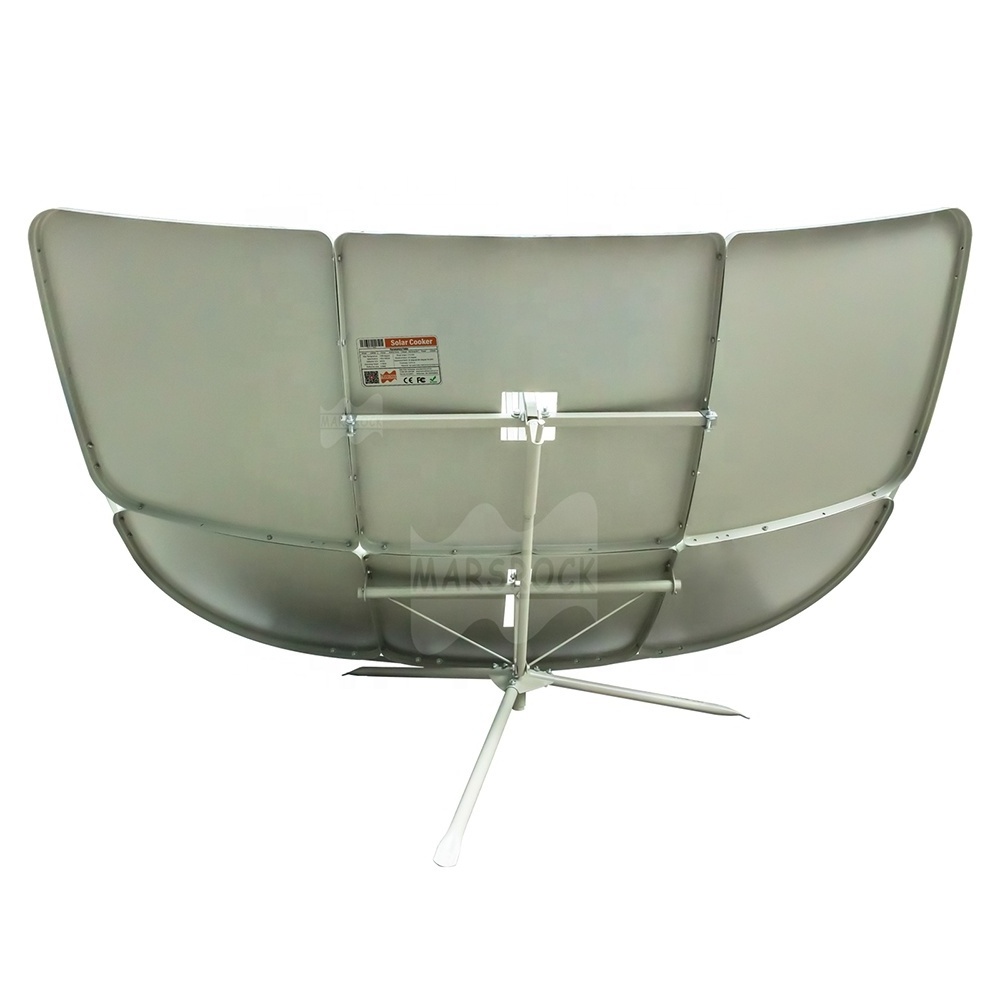
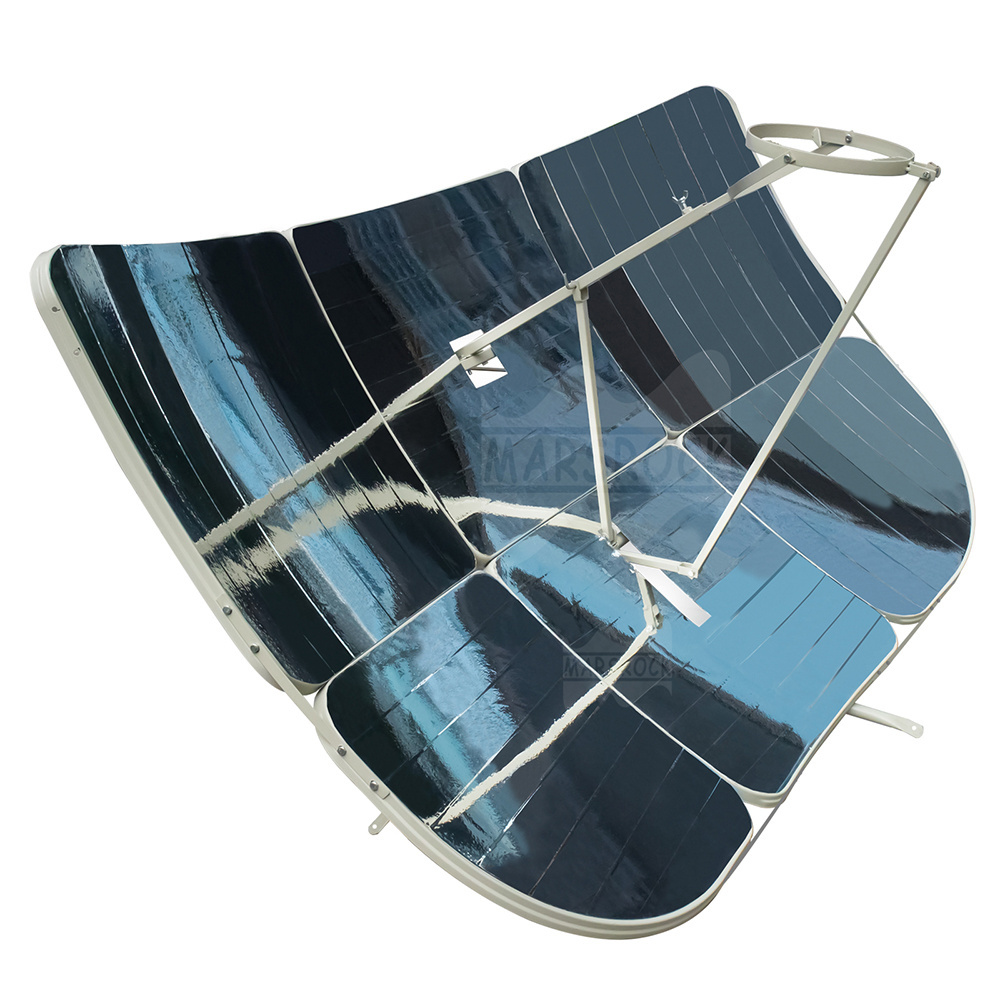
It is a new type of kitchen utensils that uses sunlight as energy. It does not use coal, electricity, liquefied gas, firewood, or a penny. It only uses sunlight to convert heat energy to boil water, cook, and stir-fry. It can be used in sunny places throughout the year without any pollution to the environment. It is a product that the world advocates energy conservation and environmental protection. Convenient and save money, one-time investment for life-long income. The stove can be used only when it is placed in a sunny place. The reflector is stamped and formed by high-quality carbon steel plate, which is composed of multiple pieces, which can be disassembled and stored, saving space, and the surface is treated with rust prevention. The overall structure of the solar cooker is compact and light, easy to install, small in packaging, and easy to carry! The high-quality vacuum aluminized film is pasted on the reflector, and the bracket is made of high-quality steel.
Feature:
1. Large expansion area, concentrated spot and high temperature,
2. The reflector is stamped from high-quality original steel plate and is treated with enhanced strength, which lasts longer than the average solar cooker.
3. The steel plate is treated with anti-rust treatment and has stronger weather resistance.
4. The solar cooker is composed of square steel plates with small packaging capacity for easy handling and transportation.
5. Do not use any fuel and electricity, use safe and environmentally friendly. Zero carbon emissions.
6. Optional wheels for easy movement.
Details Images

Product Paramenters
|
Mars Rock Power Soalr Cooker specification
|
|
|
||
|
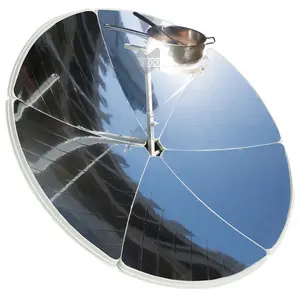
Focus
|
Positive focus
|
Partial focus
|
||
|
Shape
|
Round
|
Rectangular
|
||
|
Power
|
1800W
|
2300W
|
||
|
Max Temperature
|
1000 degree
|
1200 degree
|
||
|
Specification
|
R=150CM
|
130X190CM
|
||
|
MOQ
|
100SETS
|
100SETS
|
||
|
Material
|
High quality Carbon steel+Vacuum aluminized film
|
|
||
|
Reflective area
|
1.8M2
|
2.3M2
|
||
|
Thickness
|
0.05mm
|
0.07mm
|
||
|
focal length
|
60CM
|
110CM
|
||
|
Elevation(Max)
|
90 degree
|
90 degree
|
||
|
Depression(Min)
|
30 degree(360 degree Rotate)
|
|
||
|
Operating height
|
100cm
|
118cm
|
||
|
N.W
|
18KGS
|
24KGS
|
||
|
Packing Size
|
70X70X15CM
|
70X70X15CM
|
||
|
Cook water time
|
1)Testing place: China,2) Time: December 01 PM: 12:00-13:00, 3)Season: Winter, 4)Temperature:10 degrees 5) wind power is 2-3
levels. |
|
||
|
|
37 minuter/3KGS water
|
21 minuter/3KGS water
|
||
Installation Instructions
Install Procedures:
Step #1 Install support legs rack Fix 3 support legs to the tripod base by tightening screws M7.
Step #1 Install support legs rack Fix 3 support legs to the tripod base by tightening screws M7.
Step #2 Assemble six reflectors together
Lay six reflectors in order on even ground as our assemble instruction picture showing,attached all screws on the hole of reflectors, then tighten them by wrench one by one.
*Do not turn the screws in the midmost hole of the upper part(by 3 square reflectors), and the second and third holes(two holes which very close to each other) of the lower part(by 1 square and 2 fan-shaped reflectors ) should be vacant . Since the support pipe and the T-shaped support bar need to be installed behind it later;
*Should protect the film on reflector, don't scratch.
Step #3 Install support pipe
Fix the U-Bolt Assembly Type 2 on the upper part reflectors, then install the support pipe on it.
*When fixing the support pipe, it's channel of the hole position should be parallel to the reflectors.
Step #4 Install T-shaped support bar
Install the fixed plate on lower part reflectors, then connecting both plates with T-shaped support bar. Both ends of T-shaped support bar should be put split pin through and the pin should be spitted.
Step #5 Connecting T-shaped support bar with support legs rack
Lift the whole the reflectors panel with your assistant and fit the cross supporting bar to the hole of support legs rack, tightening the screw 10 in order to fix them together.
Step #6 Install cross support bar
Fix cross support bar on support pipe by screws.
Step #7 Install spiral regulating device
Fix the other U-bolt assembly at the bottom of T-shaped support bar. Connecting T-shaped support bar with cross support bar by spiral regulating device.
*Fix the tail firstly, then fix the head of this device.
*The spiral regulating device is length-adjustable
*The head should be the rocking handle side of this device.
Step #8 Install Y-shaped support bar(short)
Install Install Y-shaped support bar(short) on the T-shaped support bar
Step #9 Install Y-shaped support bar(long)
Connecting T-shaped support bar with cross support bar by Installing Y-shaped supporting bar(long) on it.
Step #10 Install stove ring and it's support bar
Assemble stove ring, then install it with the cross support bar. Connecting stove ring with Y-shaped support bar(short) by stove ring support bar. Tighten the stove ring by tightening screw 10.
Step #11 Fix the reinforcement strip between the gaps of reflectors
Fix the reinforcement strip between the gaps of reflectors(at the bottom and two sides ).
For better understand the installation, inviting you to view our above instruction vedio.
Packaging and shipping

Hot Searches
