- Product Details
- {{item.text}}
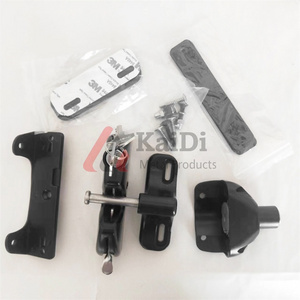
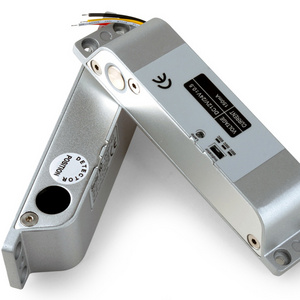
Quick Details
-
Type:
-
fence lock
-
Material:
-
Steel
-
voltage:
-
12VDC/12VAC
-
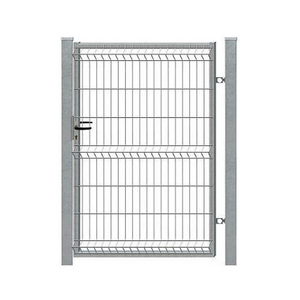
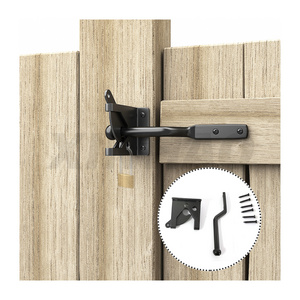
Used for:
-
swing gate, sliding gate, gates
-
Color:
-
Black
-
Certification:
-
ISO9001
Quick Details
-
Place of Origin:
-
Jiangxi, China
-
Brand Name:
-
BISEN
-
Product Name:
-
electronic lock
-
Type:
-
fence lock
-
Material:
-
Steel
-
voltage:
-
12VDC/12VAC
-
Used for:
-
swing gate, sliding gate, gates
-
Color:
-
Black
-
Certification:
-
ISO9001
Electronic Safety Car Door Lock 12V
Products Description

|
Electronic Safety Car Door Lock 12V |
|
|
|
|
|
|
|
|
|
|
|
|
|
|
|
|
|
|
|
|
|
|

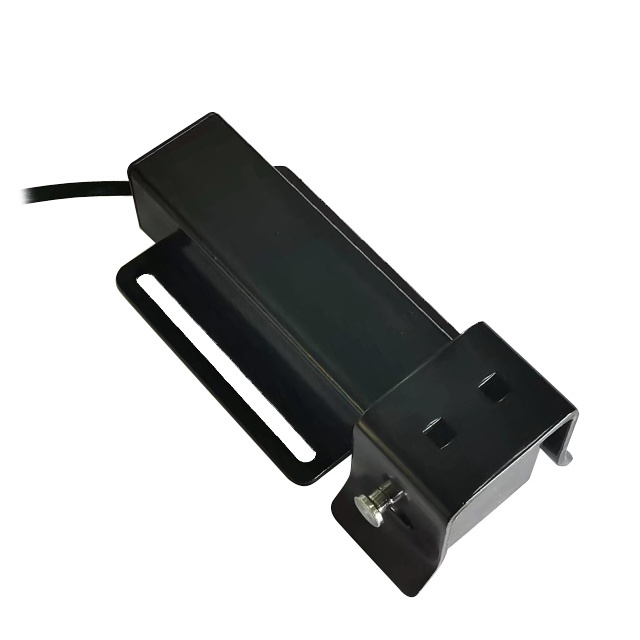
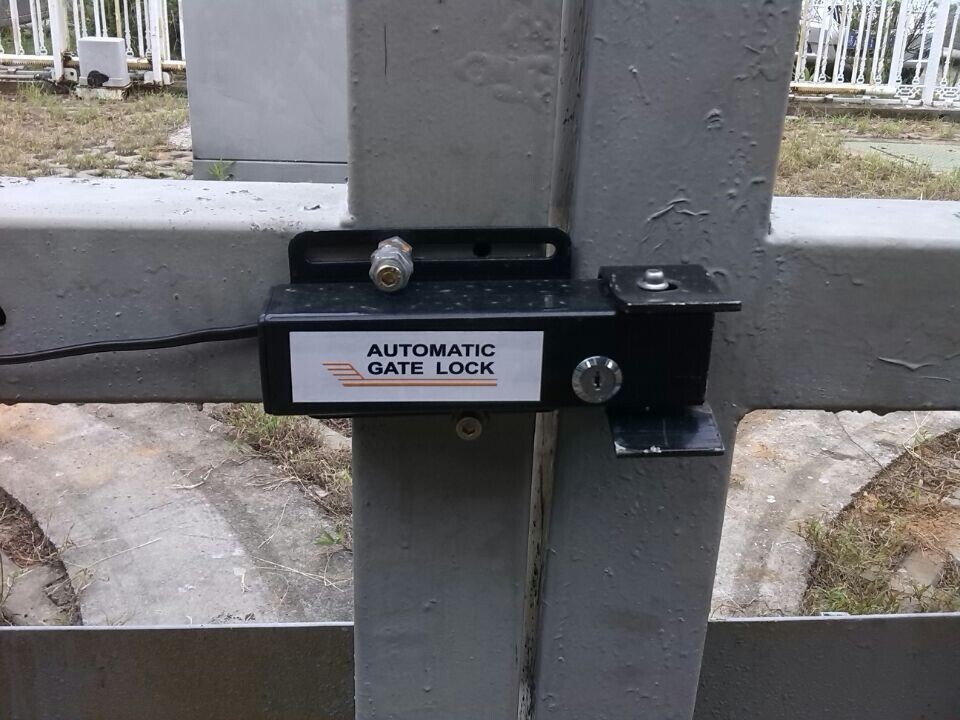
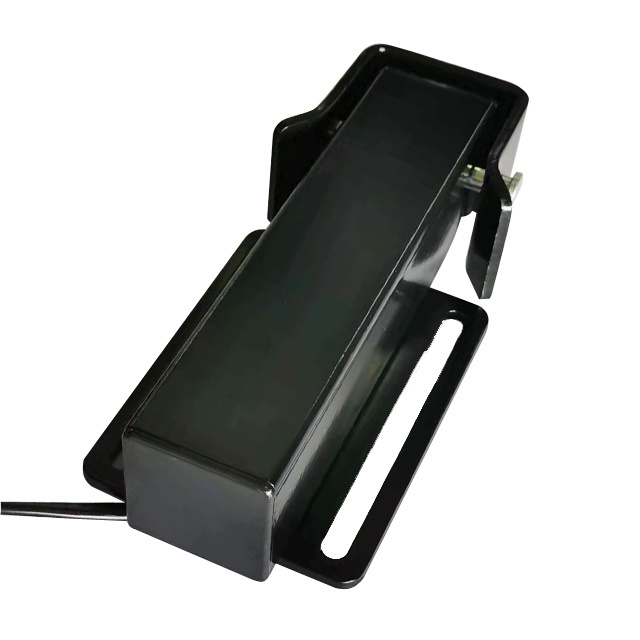
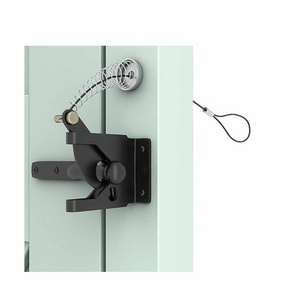
MOUNTING THE LOCK AND RECEIVER

STEP 1:
Remove the front end of the actuator theat is attached to the gate bracket with a clevis pin nd clip pin. Wire tie of clamp the front end on the gate to support it. This will enable you to swing the gate manually while installing the gate lock. Please note that the front ends of both actuators need to be disconnected for dual gate systems
STEP 2:
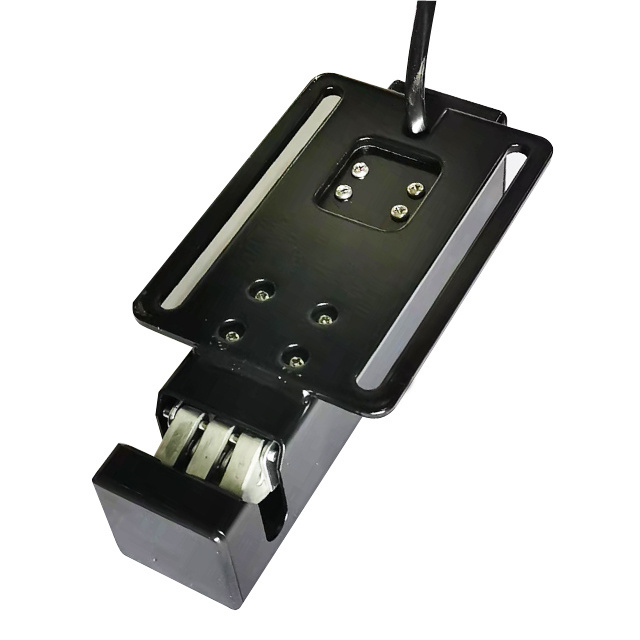
Swing the gate to the closed position. Find the best position to mount the lock and the receiver. It must be level with the actuator. The lock should be mounted on a gate cross member or other solid part of the gate surface. The receiver should be mounted on the adjacent fence post. See illustration C.
STEP 3:
Using the provided wire ties or C-clamps, position the lock in an approximate mounting position on a cross
member or other mounting surface that is level with the actuator. The lock can be moved into an exact position
later in the installation process.

STEP 4:
Find a location on the fence post level with the gate lock and temporarily tie the lock receiver into position using the nylon ties provided. Slide the gate lock back and forth until it lines up with the receiver. The pin holes on the receiver must line up with the slot in the lock. Once this position is achieved, mark the post through the center of the two slots in the receiver.
STEP 5:
Drill through the marks on the post and attach the receiver with the mounting bolts, washers and nuts that you have purchased.
STEP6:
The gate lock must now be permanently mounted to the gate cross member or gate surface. Make sure that the lock is aligned with the receiver and mark holes on the gate through the upper and lower slots on the lock.
STEP7:
Drill holes through the marks and attach the lock to the gate surface with the appropriate hardware. Do not use bolts greater than 5/16 inch diameter as they will not It through the slots. See illustration below.
STEP 8:
Insert the clevis pin through the holes in the receiver and hammer the locking cap onto the bottom of the pin.
NOTE: it may be easier to remove the receiver from the post and then hammer the pin into the blocking cap on a hard surface. Then the receiver can be remounted to the post.
.


Hot Searches
