- Product Details
- {{item.text}}
Quick Details
-
Lamp Body Material:
-
Aluminum Alloy
-
Lamp Luminous Flux(lm):
-
1000 + lumens
-
Input Voltage(V):
-
2.8V-4.2V
-
Place of Origin:
-
Guangdong, China
-
Brand Name:
-
OEM/ODM
-
Model Number:
-
FC13
-
Product name:
-
Long Distance Hunting Flashlight
-
LED Light Source:
-
XHP50.2/SFT40
-
Size:
-
113.7mm (length) *29mm (head diameter)
-
Battery:
-
1*18650 rechargeable Li-ion battery
-
Switch:
-
side switch
-
Brightness:
-
3500Lumens
-
Beam Distance:
-
239m
-
Runtime:
-
960h
-
logo:
-
Custom Logo Acceptable
-
Certification:
-
Ce FCC RoHS
Quick Details
-
Battery Type:
-
18650 rechargeable Li-ion battery
-
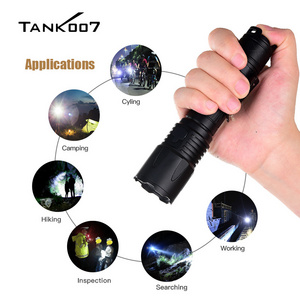
Usage:
-
Camping
-
Power Source:
-
rechargeable battery
-
Lamp Body Material:
-
Aluminum Alloy
-
Lamp Luminous Flux(lm):
-
1000 + lumens
-
Input Voltage(V):
-
2.8V-4.2V
-
Place of Origin:
-
Guangdong, China
-
Brand Name:
-
OEM/ODM
-
Model Number:
-
FC13
-
Product name:
-
Long Distance Hunting Flashlight
-
LED Light Source:
-
XHP50.2/SFT40
-
Size:
-
113.7mm (length) *29mm (head diameter)
-
Battery:
-
1*18650 rechargeable Li-ion battery
-
Switch:
-
side switch
-
Brightness:
-
3500Lumens
-
Beam Distance:
-
239m
-
Runtime:
-
960h
-
logo:
-
Custom Logo Acceptable
-
Certification:
-
Ce FCC RoHS
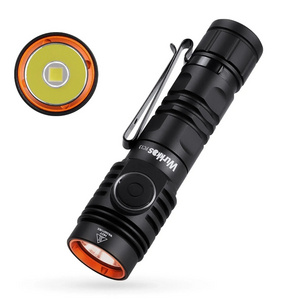
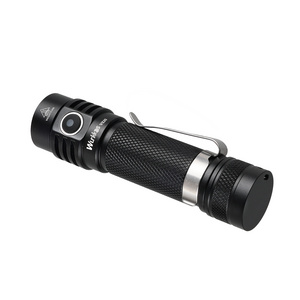
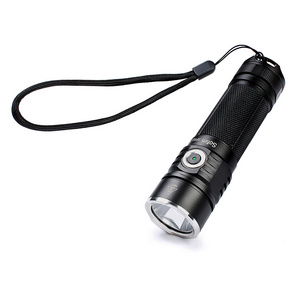
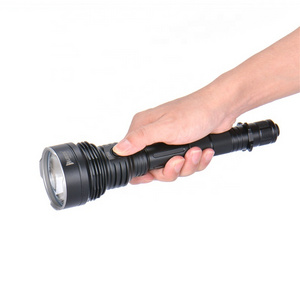
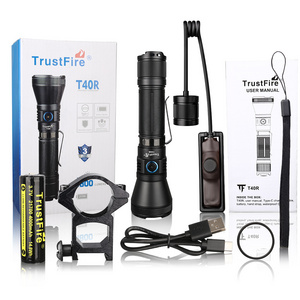
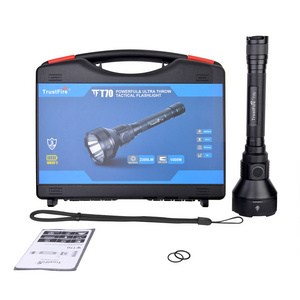
Wurkkos FC13 XHP50.2 LED 3400 Lumen 239 Meters Long Distance Hunting Rechargeable 18650 EDC Flashlight Tactical Toch Light
Wurkkos FC13 is a powerful, versatile EDC / outdoor flashlight, powered by one 18650 rechargeable
Li-ion battery,designed for home, EDC or outdoor activities. It uses 1*5700K XHP50.2 LED and BLF
Anduril 2.0 UI .With 5V/2.4A charging and reverse charging function, can be used as a power bank in
emergency situations.
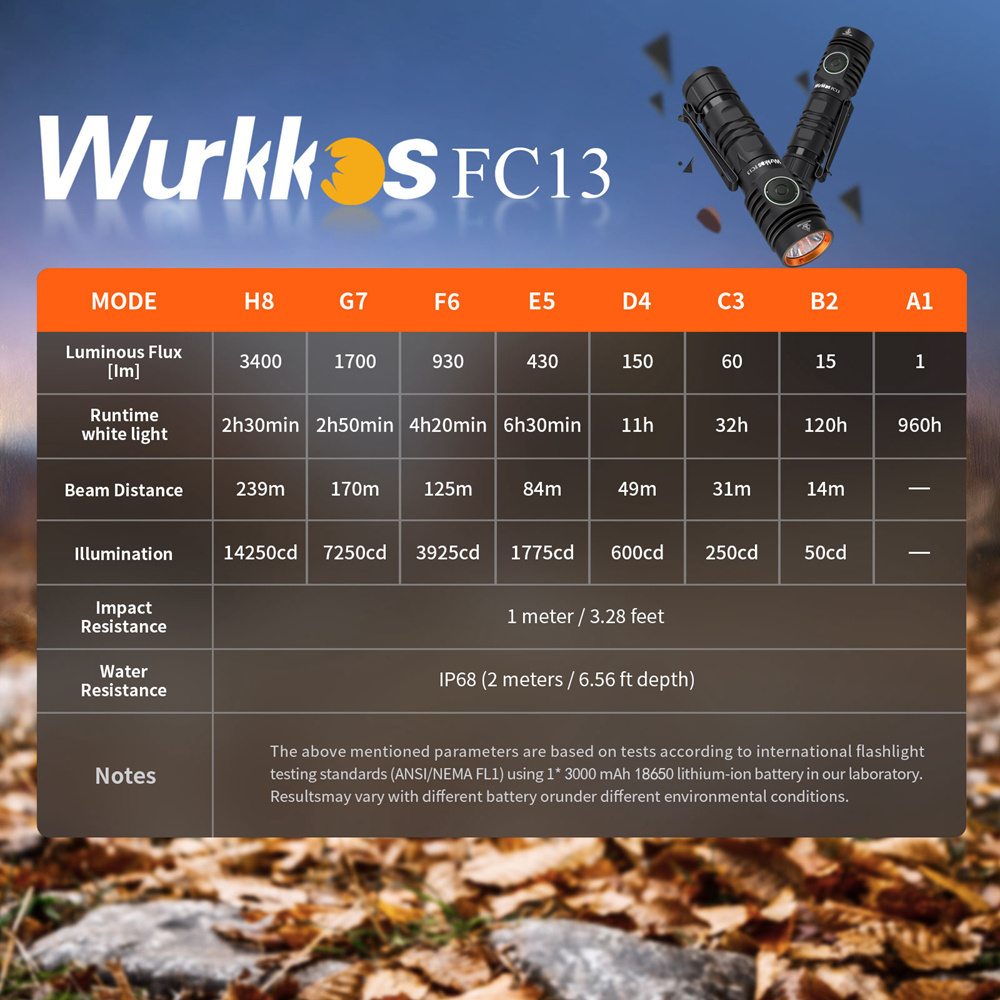
It delivers a maximum output of up to 3400 lumens with a maximum range of 239 meters. It will be your
reliable partner for every day use and with fun.
Operation Instructions
Quick Start
Basic usage is simple:
Click to turn the light on or another click to turn it off.
- Hold the button to change brightness.
- Release and hold again to change brightness the other way.
-When on 3 clicks to toggle between stepless dimming and stepped modes
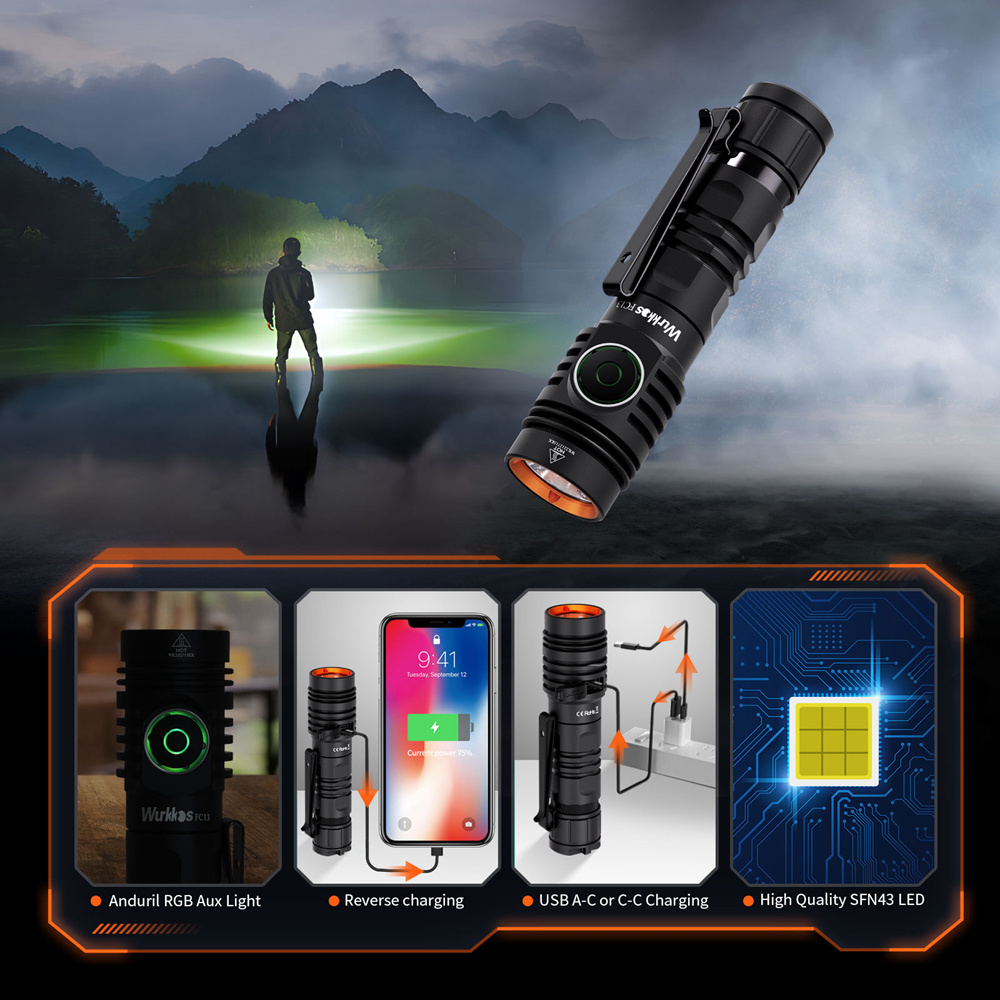
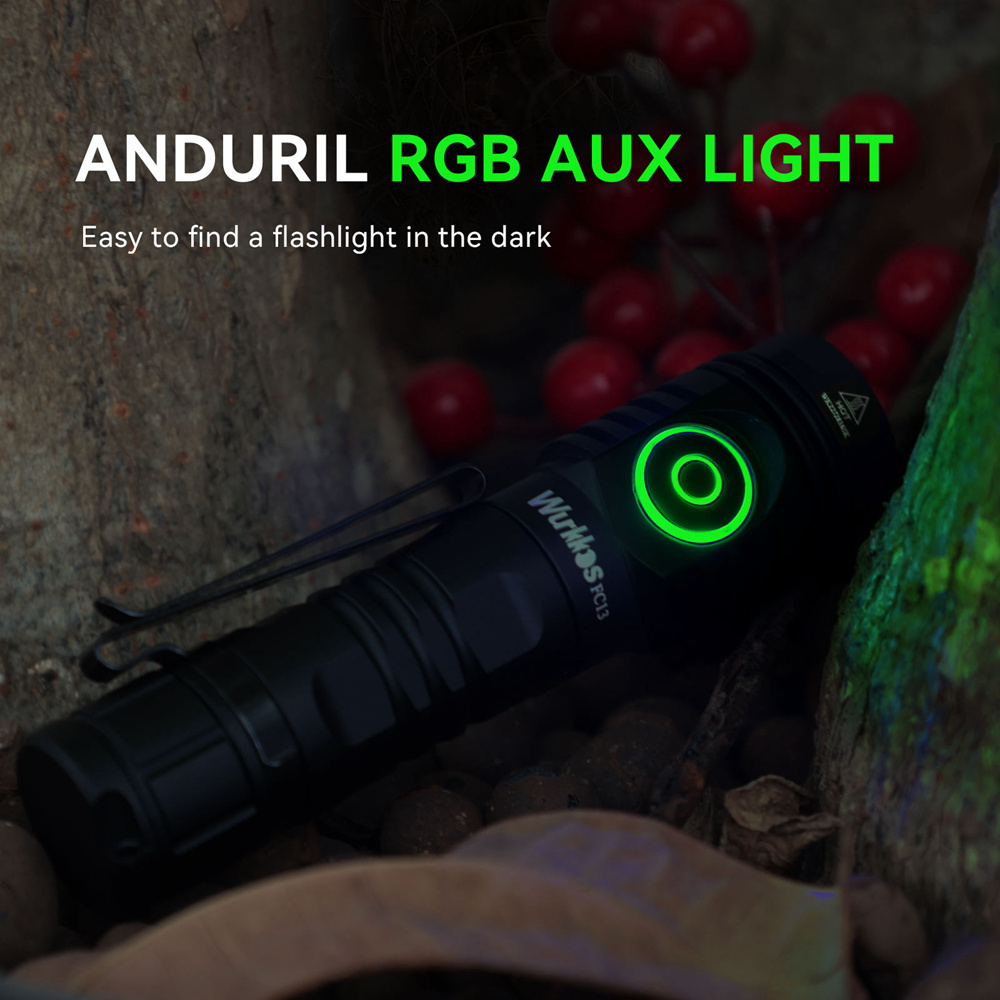
Aux button light(work in Advanced UI):
Just like with single-color aux in Anduril, RGB aux has 4 “modes” that are controlled by 7C:
Off-Low-High-Blinking
But RGB aux adds color options that are controlled by 7H:
Red-->Yellow (red+green)-->Green-->Cyan (green+blue)-->Blue-->Purple (red+blue)-->White (red+green+blue)-->Disco (random colors)-->Rainbow (changes colors in order)-->Voltage (changes color based on LED voltage)
When in the Voltage color option, the colors are:
> 4.4V: white-ish (red+blue+green)
4.1-4.4V: purple (blue+red)
3.9-4.1V: blue
3.7-3.9V: cyan (green+blue)
3.5-3.7V: green
3.3-3.5V: yellow (red+green)
2.9-3.3V: red
< 2.9V: off
By default, Anduril 2 is set up to use:
While off: low brightness, voltage color mode
While locked out: blinking, disco mode
I think you are in Voltage mode, which is the default. So the color is changing based on the battery voltage. When the flashlight is used, it causes the battery’s voltages to drop a little bit. The voltage goes back up slightly when you turn the flashlight off and the battery rests for a second.
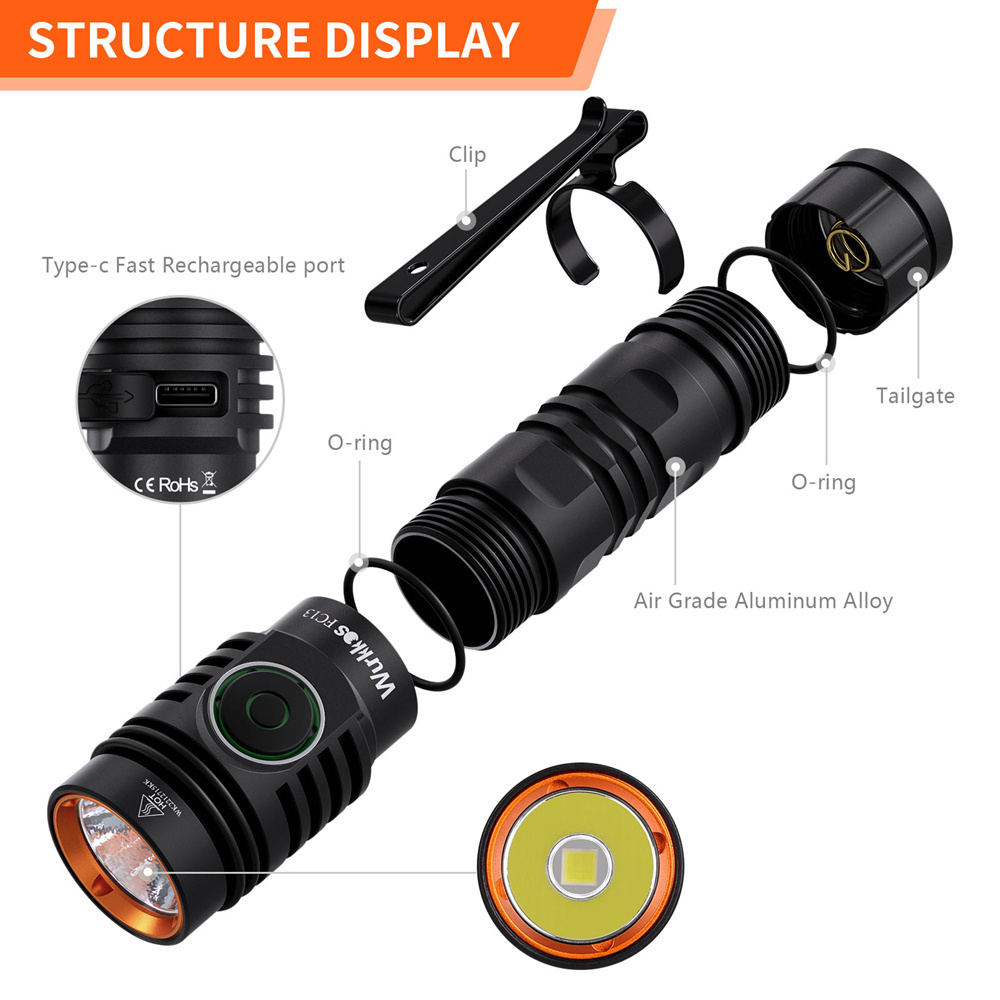
-Charge&Reverse Charging: Max input/output 5V 2.4A with USB C Rechargeable port.
When charging: power indicator flash orange and turns to orange after full.
Reverse Charging: Power indicator turns orange , while the indicator flash blue, means low battery.
That is all the user needs to know for basic use, but there are many more modes and features available for people who want more.
Before reading the rest of this manual, it is recommended that users look at the Anduril UI diagram(s), which should be provided along with the flashlight.
Button presses
Button presses are abbreviated using a simple notation:
- 1C: One click. Press and then quickly release the button.
- 1H: Hold. Press the button, but keep holding it.
- 2C: Two clicks. Press and release quickly, twice.
- 2H: Click, hold. Click two times, but hold the second press.
- 3C: Three clicks. Press and release quickly, three times.
- 3H: Click, click, hold. Click three times, but hold the final press.
The same pattern is used with higher numbers too. For example, 10C means ten clicks... and 10H means ten clicks but hold the final press.
Simple UI Diagram
Simple UI Diagram Not everything is covered in the diagram, please read the text.
Simple UI
By default, the light uses a simple UI. This is useful if you lend the light to someone else, or if you just don't want
to bother with any crazy disco modes.
Simple UI has all the basic functions needed to work as a flashlight, but the minimum and
maximum brightness are limited to make it safer, and any complex or advanced functions are blocked.
Functions available in Simple UI include:
- 1C: On / off
- 1H: Ramp up (or down, if button was released less than a second ago)
- 2H: If light is on : ramp down
If light is off: momentary high mode
- 2C: Double click to go to / from highest safe level
- 4C: Lockout mode.
Some other modes and functions are available too. When the light is off, these are the options:
- 3C: Battery check mode. (displays voltage once, then turns off)
- 4C: Lockout mode.
- 10H: Switch to Advanced UI.
- 15C or more: Version check.
-7H:Aux LED mode adjust
In Lockout mode with Simple UI, there are a few functions:
- 1H: Momentary moon
- 2H: Momentary low
- 4C: Unlock and turn on
- 4H: Unlock and turn on at low level
- 5C: Unlock and turn on at high level
To change between Simple UI and Advanced UI, turn the light off and then do one of these:
In Simple UI:
- 10H: Go to Advanced UI.
In Advanced UI:
- 10C: Go to Simple UI.
- 10H: Configure Simple UI.
If you get lost, or if you want to auto-calibrate the temperature sensor, do a Factory Reset. The process for this is:
- Loosen body tube
- Hold button
- Tighten body tube
- Keep holding button for about 4s
The light should flicker while getting brighter, then briefly burst to full power. Hold until it reaches full power to do a reset,
or let go of the button early to abort.
Advanced UI
Advanced UI has all the advanced functions which are fun to play with but also hard to learn. Please refer the UI diagram below.
Also could ask us for pdf file so you can ready easily. We can also send video link to show how to play with Anduril2
Safety Instructions
*
Operating the flashlight for a long time in Turbo or High mode will warm it up. This is normal.
*
When installing the battery, make sure the anode (+) side always faces towards the head/LEDs.
*
Unscrew the tailcap half a turn to avoid unwanted activation during transport. It also prevents the battery from
draining while the flashlight is in standby.
Troubleshooting and Maintenance
*Disassembling the sealed head can damage the flashlight and voids the warranty.
*
Wurkkos Ltd. recommends using high-quality brand batteries. Damage by battery leakage voids the warranty.
*
Remove the battery if the flashlight will not be used for an extended period of time.
*
To prevent self-discharge or accidental activation during storage or transportation, unscrew the tailcap by half a turn or remove the battery.
*
Every 6 months threads should be wiped with a clean cloth followed by a thin layer of silicone grease.
*
To maintain a proper level of waterproofness, replace worn-out o-rings with an approved spare.
*
Troubleshooting: Clean battery contacts regularly as dirty contacts may impair the performance of the flashlight. If you experience problems
(flicker, shine intermittently or failure turn on) the following root causes and solutions should be tried:
Reason A: The battery needs a replacement.
Solution: Replace the battery with an approved type of a fully charged battery.
Reason B: Threads, PCB board contact or other contacts are dirty.
Solutions: Please clean the contact points with a cotton swab soaked in rubbing alcohol.
Reason C: The flashlight will not turn on upon first use.
Solution: Please do not forget to remove the insulation sticker from the battery on first use.
If the above methods do not work please refer to the warranty policy before contacting your authorized distributor.
Warranty: 12 months after the buyer recevied
Shipping:
* Samples are available at any time.
*Small orders(Trial orders) just need 3-5 working days.
*OEM Orders just need 10-15 working days.
Product payment terms:
1) Accepted sample and small order(Trial order)
2) Ready to ship out within by sea, EMS, DHL, FedEX, UPS,as soon as we receive payment.
3) We accept T/T, Western Union,Paypal,LC
Return &refund terms:
1) The items have 12months warranty, defective products can be changed during the warranty.
2) Defective products must be returned within 30days from the shipping date, we will change another one for you.
After sale service & promise:
1. Supply oem&odm order, independent QC department , 3 times of quality checking
2.100% percent of pass before shipping.